Showing posts with label In the kitchen. Show all posts

February 10, 2015

Whole30: DONE!


Yesterday was my last day of the Whole30! While I am pretty excited to try some foods that I missed (cheese, homemade bread, chips & salsa), I am not feeling the urge to completely binge or go crazy on those foods. I miss them on occasion, but what I learned from doing the Whole30 is that I don't need those foods in my diet. If I get home from work starving and craving pizza or something bread-y, I can take a little time to cook a clean meal and I am completely satisfied. It's been empowering to realize this.


It was definitely a challenge, but it really got so much easier by the 3rd and 4th week. I would say the hardest part was being completely strict, as in no leeway or cheat meals allowed. For the future, I've decided that I am going to do my best to eat Whole30/paleo during the week and then give myself some freedom on the weekends. It also taught me how to eat at home. It's so easy to choose to eat out, because, duh, it's easy. But since there really isn't much in restaurants that is Whole30 compliant, I had to eat at home, and it really wasn't bad. In fact, it was good. No, every meal was not amazing. Some were awesome (we made both shepherd's pie and pork chops twice!), and some meals were simple and nothing to write home about. But even if it's just okay, and I can still be satisfied and feel great afterward. It's good food that is nourishing my body, and that's what matters.

January 26, 2015

Favorite Whole30 Items from Costco


This is probably not ground breaking information, but I just thought I'd share in case others are looking for Whole30 compliant foods to buy at Costco. On my first Whole30 shopping trip it took me forever to scan through the ingredients on each product and figure out what was compliant. That store is huge, but if you know what you're looking for, it makes the chore a lot easier!

January 20, 2015

Whole30: 10 days in

I'm 10 days in and I have to say, eating Whole30 compliant hasn't really made my life all that different. We are eating delicious food, I feel full after a meal, and we're still doing the same things with our day-to-day schedule. Just maybe a little more time spent in the kitchen prepping (on my part anyway...).

Random notes & thoughts:

+ It really isn't that hard to eat well during the week. Every night in the first week I craved bread, a glass of wine, dessert, SOMETHING with sugar in it, but I am slowly getting used to it. This is interesting to me because I'm not that much of a sweets person, but I guess sugar has always been somewhere in my diet, so when I can't have it I crave dessert. We make mocktails if we're feeling weak - seltzer water and fresh lemon juice - or sometimes I'll have some hot raspberry tea. They certainly don't have the flavor that I'm used to in the evenings, but it really helps to be sipping something.

January 12, 2015

Whole30: The Start

Pardon the radio silence - I know it's been awhile! And I know 2014 was overall sparse... I took some unintentional time off from blogging, simply to have a mental reset. I felt like I needed to reevaluate what I spend my time on and find out what was worth my time. I don't know if I'm fully back to blogging, but I wanted to document my experience through Whole30, just to keep track of this own personal goal of mine.


I started Whole30 yesterday. Thankfully Michael is doing it with me, even if he's already said he wants a "cheat day" on the weekends. I don't blame him - this diet is no joke. It is whole foods only, omitting all grains, dairy, legumes, sugar, and alcohol. It sounds pretty scary when you read that list.

It all started when I read this post by Anna almost a year ago.

July 18, 2014

Roasted pepper, goat cheese, & basil pasta


Happy Friday! Thank goodness it's the weekend, amiright?! The weather here has suddenly cooled to a beautiful 80-degrees-and-sunny for the last couple days, which is unheard of mid-July in North Carolina. We have been eating out on our back patio in the evenings, exercising outside, and overall just enjoying the lack of humidity. It's been lovely. It also makes it especially hard to sit in an office all day, hence the strong TGIF emotions I've been feeling all day!

March 26, 2014

How I Use Pinterest

a pin from my "decor" board

For some reason, Pinterest is something that I don't spend much time on. It seems to be an addiction for a lot of girls I know. I have friends who literally scroll through Pinterest on their phones throughout the day and talk about spending their evenings getting lost on it. But for some reason, I rarely ever get on to just browse. I'm not really sure why, because I love some of the inspiration I get when I'm browsing. However, I think a lot of time it makes me feel lazy. I look at pictures of food that I really want to make in my kitchen or house updates I want to tackle, and I feel lazy just sitting there on the computer instead of doing those things. So for the most part I don't spend a ton of time just browsing on Pinterest.

BUT this is not to say that I do not use it. I think I might just use it in a little bit different way than other people do. Whenever I go to Pinterest, it is with an intent purpose. Most of my pins are not re-pins, they are pinned from things that I'm looking at out on the web. I probably pin at least one article or recipe daily. Pinterest has become a handy tool in my kitchen, for design inspiration, and for life. I think it is an awesome central location for idea sharing and it's crazy to think that just a few years ago it didn't exist! Here are some ways I use it to keep my life organized.


October 17, 2013

You should make this bread


While I love me some fresh bread, I don't have the time to spend all day making it like I did here. When I saw this recipe, it looked fairly simple and didn't seem like it would take that long so I gave it a whirl on a random week night. And I'm SO glad I did. This bread is flavorful and perfect for toasting for breakfast. Add a little cinnamon sugar or strawberry jam on top and you're good to go. The best part is that this bread is so easy and simple. I whipped up the dough of only 5 ingredients, let it rise while I watched a TV show, baked it in the oven for 30 minutes, and then let it cool. I actually halved this recipe and it worked really well!

November 6, 2012

Apple Crisp Pie


Of course when you go to an apple orchard and come home with two large bags of apples, you must make lots of apple desserts! Every year for Thanksgiving (and sometimes Christmas too), my sister makes a traditional apple pie with a flaky crust topping, and it's amazing. But I was craving a crispy crumbly topping instead, so I tried this recipe from Jen at Beantown Baker. It was just what I was hoping for! It is packed with apples, sugar, and spices, and the crumble topping is perfection. Mine had more liquid than the one pictured Jen made. And I probably would use a deep dish pie pan if you had one. I didn't, so I used a 9-inch pan and that worked fine!

This pie was incredible. You should totally make it if you've got a bunch of apples lying around. And if you don't, just go buy some at the grocery store because this pie is calling your name.


Apple Crisp Pie

Filling:
6 c apple chunks (I used 3 Pink Ladies and 3 Fujis)
1/2 c brown sugar
2 tbsp flour
2 tsp cinnamon
1/4 tsp allspice
1 tsp vanilla
1 tbsp lemon juice

Topping:
1 1/4 c four
1/2 c brown sugar
1 1/2 tsp cinnamon
1/4 tsp nutmeg
1/4 tsp salt
1/2 c butter, melted

Preheat oven to 425 degrees. Prepare dry filling ingredients in a large bowl, set aside. Core, peel, and slice apples (I used an apple/peeler/corer/slicer which made this normally long process a dream!). Transfer into large bowl with dry ingredients. Top off with vanilla and lemon juice. Toss to coat apples well. Set aside for 10-15 minutes while you prep the dough.

Fit your pie crust into a pie plate (I used a store bought crust). Fill pie crust with prepared apple filling.

In a medium bowl, combine the dry topping ingredients. Pour cooled melted butter into bowl. Toss and cut until small to medium sized chunks form. Break up large chunks as needed. Using a spoon, sprinkle crumb topping over entire pie.

Cover pie loosely with foil. Bake at 425 degrees for 20 minutes, then reduce heat to 375 and continue baking for an additional 35 minutes. Remove foil for a few minutes at the end to get the topping more crispy if you prefer. Cool and enjoy!

source: Beantown Baker guest post on Nutmeg Nanny

October 15, 2012

Home reveal: Kitchen

So remember where we left off? A few weeks ago we were looking at the living room and dining room, and now I've finally photographed the kitchen. This room was probably the one that came together the fastest, since there wasn't much furniture involved. I did change things around a lot at first though, like the stuff in the cabinets and the appliances on the counters. It's always so hard to figure out how to organize a new and different kitchen! Let's take a look at what it's looking like now...


Of course since we're renting I have no say in what the kitchen looks like, and while it's a little dated with the wallpaper, the stainless appliances and white corian counters make up for it! And at least the wallpaper is neutral. The blue tile is also not something I would pick, but it somehow goes with my kitchen colors and I love that it's unique and a little old feeling.


One thing that was tough to get used to is the lack of a pantry. My apartment had a great pantry in addition to a good amount of cabinet space, so coming to a kitchen with the same or maybe less cabinet space and no pantry was tough (my New Yorker readers are probably laughing at me). Those baskets that I found at Michaels were perfect for storing our coffee/tea on the counter and snacks above the fridge. We also ended up buying a small cabinet at Home Depot for extra food storage, which helped a ton. It's sitting in our dining room right outside the kitchen door.


This is probably my favorite thing about this kitchen! I don't love how it's closed off from the living room area, but this breakfast nook is its saving grace. I really love having a mini table where we & our guests can eat meals, or just hang out while there's cooking going on. I also like having wall space to hang things. Our old kitchen didn't have any wall space!


So that's the kitchen. Maybe in another month I'll post pictures of another room. Just kidding! I'm hoping to post more in the next week or two. Get ready!

Also, for those of you who care, here's a source list:
Table & chairs: Craigslist find
White desk organizer: Pottery Barn
Red pitcher: HomeGoods
Glass canisters: Ross
Baskets: Michaels
Rugs: HomeGoods
Extra cabinet: Home Depot (Martha Stewart brand)

May 2, 2012

Green thumb wannabe


I mentioned that I picked up some fresh herb sprouts at the farmers market this weekend. Basil and cilantro, two of my faves. Last year I grew them from seeds. They lasted a while and I got to use them in some recipes, but I also didn't know what I was doing. The nice guy at the farmers market, or I guess I could call him the farmer (duh), told me how to care for these precious little guys. "Morning sun, afternoon shade. And don't over-water the basil." Last summer it was so hot that I watered my plants all the time, thinking they needed more to drink in the stifling heat. But soon my basil had yellowing leaves, and I found out I was drowning him as well as scorching him in the afternoon sun. My cilantro pretty much keeled over at one point, maybe from too much sun as well. So I obviously made some changes this year: brought them off the balcony onto the table so they'll get the morning sun and be shaded in the afternoon; waiting to water until they really need it, which is not necessarily every day. I'm sure hoping this works better! So far they look great... but then again I've only had them for 4 days. Hopefully my black thumb is at least turning a hunter green by now, so these beautiful guys actually stand a chance!


May 1, 2012

Strawberry bread


It's strawberry season, y'all! There is truly something amazing about fresh strawberries. I grabbed a bucket at the farmers market this weekend and they are incredible! They are 10x better than grocery store strawberries and they helped me whip up this spectacular bread. Honestly I was just looking for a recipe that had minimal ingredients since I didn't want to go to the grocery store, and this one turned out to be perfect. I halved the original recipe so it would just make one loaf, but seeing that hubby and I devoured half of the one in about the first hour, I probably should have made two! The next day I was wanting more, so I turned the recipe into muffins by adding a little milk. Perfect for breakfast all week :)

Strawberry Bread

1/2 cup oil
1 cup sugar
2 eggs, beaten
1 1/2 cups flour
1/2 tsp baking soda
1/2 tsp salt
1.5-2 cups chopped fresh strawberries, or 1 10-oz. package frozen strawberries*

*If you're using fresh ones, save a couple before chopping to use for the top. Also the amount is a guesstimate - just eyeball it. Add enough to make it good, but don't overload the dough.

Preheat oven to 350. Mix oil, sugar, and eggs. Add flour, baking soda, and salt. Mix well until thoroughly blended. Add in strawberries. They will mash a little in this process and that's okay.  Grease a loaf pan and sprinkle with sugar. Pour batter into the loaf pan. Slice 1-2 strawberries and lay the slices on top. Bake at 325 for 1 hour. To make it fancy, serve with cream cheese and extra strawberries.

adapted from: Just Cook Already


And just because it's fun, here's a cute May calendar for your desktop or phone via RedStamp! Follow them on Facebook and you'll get a cute calendar for every month of the year. I LOVE this month's!

desktop
phone
(I did not get asked/paid by RedStamp to promote this, I just wanted to share it with you because it's cute!)

April 1, 2012

Roasted Corn on the Cob

This weekend I had a wonderful date with my friend Jenn. We went to California Pizza Kitchen for lunch and then walked around the outdoor mall and browsed some of my favorite stores: Pottery Barn, Anthropologie, Crate & Barrel. As soon as we walked into Crate & Barrel we got so excited about all of their bright summery colors! I walked out with just a couple of items, but I'm very excited about them:


Just the other day I realized I didn't have any corn picks, and therefore I hadn't made much corn on the cob. When I saw these I knew it was a sign I had to have them! While I was checking out, the lady at the register told me about some amazing seasoning to go on corn. Apparently everyone has been raving about how good it is. So of course I had to get that too :)


I wish we had a grill, but since we don't I tried out roasting the cobs in the oven. I preheated the oven to 350, and then shucked the corn. (For some reason I always feel like a prairie girl when I do this. Is that weird?) I placed the cobs on some foil and sprinkled seasoning along with a just little olive oil drizzled over top.


I wrapped them up tightly, placed them directly on the oven rack, and roasted them for about 30 minutes at 350 degrees.


The result was pure, steaming deliciousness.


The seasoning was amazing and it had so much flavor I didn't feel the need to slather butter all over it. Served with some leftover cheeseburger pie, we had ourselves a wonderful and easy Sunday night dinner!


I'm so excited to have corn on the cob all summer! And hopefully when we move we will be able to grill it :)

March 29, 2012

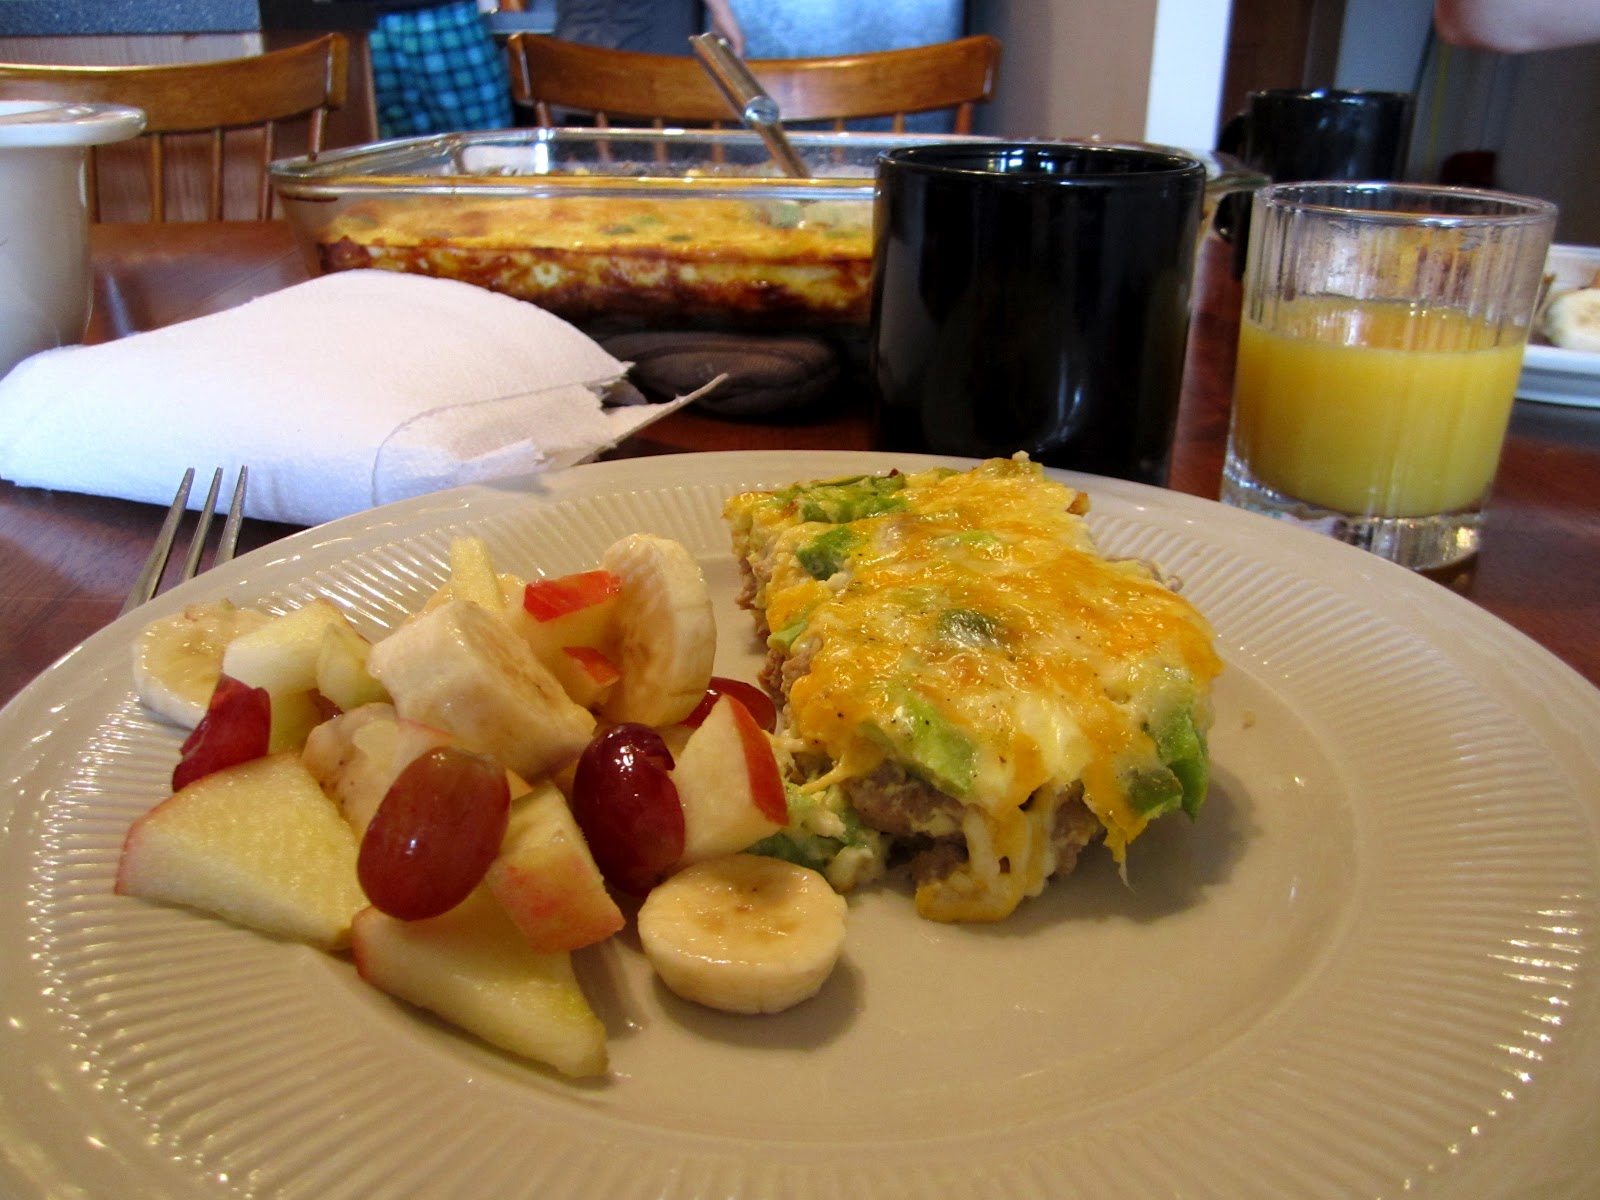
Crescent Roll Breakfast Casserole

The other day I posted about my girls weekend, and how we had this casserole for breakfast:


It was truly delicious and I knew I needed to share it with you! I made it Thursday night, froze it, and then it thawed on the 4-hr drive up to Blacksburg (since it was frozen, it remained cold and I didn't have to bother with a cooler). I put it in the fridge overnight and then took it out as soon as I woke up, so it would warm a little before baking. This worked really well and made it so easy not to have to worry about cooking anything that morning! That just gave us more time for talking over coffee :)

Crescent Roll Breakfast Casserole

1 can crescent rolls
1 lb. sausage (I used turkey breakfast sausage)
1 small onion, chopped
1 green or red bell pepper, chopped
8 eggs
1 cup milk
salt and pepper to taste
2 cups shredded cheddar cheese

Preheat oven to 375. Brown sausage and onion; drain if necessary (my turkey sausage didn't really have any grease to drain). Spray/grease a 9x13 pan and lay down the crescent roll flat on the bottom (leaving all triangles intact). Layer sausage and onion mixture on top. Add chopped bell pepper (if you'd prefer not to have crunchy bell pepper, saute these with the onion and sausage in the first step). Layer the cheddar on top. In a separate bowl, beat eggs, adding milk and salt and pepper. Pour the egg mixture over meat and cheese. Bake for 30-40 minutes, or until bubbly.

adapted from: Pearls, Handcuffs, and Happy Hour, found on Pinterest

March 17, 2012

Grasshopper Pie


When I emailed my grandma to get this recipe (yes, she has a laptop computer - she's so with it), she told me that the original recipe calls for crushing Oreos to make a pie crust, but that was "much too much work - just buy a chocolate pie crust" (as if this recipe needs to be simplified even more). Not to argue with Grandma, I bought an Oreo pie crust and whipped up this pie in about 10 minutes. The hardest part was finding a place in my freezer that was level! This pie is minty and chocolatey - one delicious combination.

Grandma also mentioned that she's making two of these pies for a couple of "St. Pat's parties" with her friends, and she even has a green hat ready to wear. I would love to be half as social and fashionable as her when I'm 81!

Happy St. Patricks' Day!!


Grasshopper Pie

2 tbsp. Creme de Menthe Liqueur, or 1/4 cup Creme de Menthe syrup*
7 oz. marshmallow cream
8 oz. whipped cream/Cool Whip, thawed
chocolate pie crust

Mix Creme de Menthe and marshmallow cream well (the liqueur I bought was green, add food coloring if you'd like it to be more green). Mix in the Cool Whip. Pour into the chocolate pie crust and freeze firm. Warm at room temperature 5 to 10 minutes before serving.

*I could not find the syrup at Harris Teeter. I had to go to the ABC store to buy the liqueur. I read online that you can maybe find the syrup at World Market or a specialty grocery store that sells a lot of gourmet coffee syrups.

March 6, 2012

Turkey Meatloaf


Meatloaf is definitely underrated. I didn't grow up eating it, but I've realized in my adult life that I really like it! I had some ground turkey that I needed to use, so I tweaked this recipe a little so that I could use what I had at home without having to go to the store. It turned out delicious! And it doesn't contain any bread, so it's completely guilt-free :)

Turkey Meatloaf

1.3 lbs. lean ground turkey
1/2 cup oatmeal
1/4 cup ketchup, + 2 tbsp
1 large egg
1 tbsp minced onion
1 tsp oregano
salt
2 tsp Worcestershire sauce

Preheat the oven to 350°. In a medium bowl, mix turkey meat, oatmeal, ketchup, egg, minced onion, oregano, and salt.


The easiest way to do this is to use your hands.


Place into an un-greased nonstick loaf pan. In a small bowl, mix 2 tbsp ketchup and Worcestershire sauce and brush onto the loaf.


Bake uncovered for 40-45 minutes at 350°, or until cooked through. Add ketchup when served if desired.
Printer-friendly version

I served it with sauteed red potatoes and a fresh salad. A pretty good meal for a Monday night!


source: adapted from Skinny Taste

February 5, 2012

Homemade Bread

Well guess what I did this weekend? I decided it was high time I learned how to bake bread.  I found this little recipe for multigrain bread on Pinterest. And for my first batch of bread, I thought I did pretty well! It was moist and soft but packed full with flavor. We used it to make grilled cheese and tomato soup on Sunday's rainy afternoon, and it was so yummy! It did take me all day to make it on Saturday, but that was mainly because of the lag time: waiting on the hot cereal mix to cool and letting the bread rise twice. But it was so worth it! If you're thinking of trying to bake bread and like a good healthy wheat bread, this one is perfect! [The instructions are rather lengthy so I'll let you jump over to Our Best Bites to read Sara's instructions.]


Now I'm headed to the kitchen to go slice off another piece... What did you do this weekend?

January 31, 2012

Hide-away Corkboard

This weekend I also completed a mini project: adding a little bulletin board inside of a kitchen cabinet door. I saw the idea on Young House Love a few weeks ago and have been wanting to try it. I thought it would be a nice place to store recipes I want to try and random pending things I don't want scattered on my counter. And it was so so simple!

First, I bought a pack of cork boards at Jo-Ann Fabrics, for about $5.


What my cabinet looked like before... 


I measured the space and cut the cork with scissors. A razor blade probably would have been more effective/neater, but I was lazy and it didn't come out very jagged so it worked well. I was planning on gluing the cork board to the inside of the door in some way, but the package came with these handy adhesive squares that worked just as well and were super easy!


Thanks to the measuring tape, they fit in there perfectly. 


Now I have a handy place to store recipes, coupons I need to use soon, and other things that clutter up my desk corner of the kitchen. This is the perfect project for a renter. I can't see the rental company ever having an issue with it, and even if they did, the cork could be easily removed. I might also add some decorative pushpins to jazz it up.


When the door's closed, you can't see a thing! I'd have to say this little project was a success!


[Did you spot my 2012 goals and resolutions list?? It's never too late to make some resolutions for the year! Click here to get yours!]

January 18, 2012

Simple night

Sometimes a simple spaghetti and meat sauce is all you need. It really is my favorite comfort food, and I realized that I hardly ever make it! I am always trying to try new things or do something fancy. Tonight I stuck with the basics. And let me tell you, this meal hit the spot.


The sauce is Giada's Tomato & Basil sauce, found at Target. I added a pound of lean ground beef, 1 clove of garlic, and a little fresh ground pepper. The spaghetti noodles are from World Market.

January 11, 2012

Cooking with Leeks

One of my goals for this year is to try 2 new recipes a week. Within the realm of that goal, I really want to experiment with different foods and techniques that I haven't tried yet:
- baking bread
- roasts, like chicken, beef, and turkey
- fish
- different quiche styles
- using veggies in main dishes like cauliflower, Brussels sprouts, okra, and leeks
- experimenting with different cultural flavors, like Latino and Indian

I have never cooked with leeks before, and when I saw this recipe I decided it was time to try them. I had no idea what they even tasted like (I've probably had them before and just never knew it). Found out they are similar to an onion - more like a giant green onion with a delicate unique flavoring. I was so excited when Michael took a bite of my experimental dish and actually liked it! He'll be honest with me about recipes, and with this one he said multiple times that he liked it (wife points!). So I will definitely be trying leeks out more in the future.

Chicken with Leeks & Sun-dried Tomatoes

1 or 2 leeks, white and light green parts only
16 oz chicken breast cutlets, sliced thin (I used just 2 large breasts and sliced through them to make them thin)
2 tsp butter, divided
2 tsp olive oil
1/4 c. all-purpose flour
1 clove garlic, minced
2 oz. ready-to-eat sun dried tomatoes
1/4 c. white wine
1/2 c. fat-free low sodium chicken broth
salt & pepper to taste
2 tbsp. chopped fresh parsley

a little weird looking, right?

Cut off green tops of leek and remove outer tough leaves. Cut off root and cut leeks in half lengthwise.

Fan out the leeks and rinse well under running water, leaving them intact. Slice leeks into 1/4 inch slices. Set aside.


Preheat oven to 200°. Season chicken with salt and pepper. Lightly dredge in flour, shaking off excess. Heat a large skillet on medium heat; when hot add 1 tsp. butter and 1 tsp. olive oil. Add chicken to skillet and cook on medium heat for about 3-4 minutes on each side, until no longer pink. Set aside in warm oven.

Add additional oil and butter to the skillet, then garlic and cook a few seconds, then add leeks, salt, and pepper. Saute, stirring occasionally until golden, about 5 minutes.

Add sun dried tomatoes, wine, chicken broth, parsley. Stir the pan, breaking up any brown bits in the bottom. Cook 2 more minutes or until the liquid reduces to almost half. Top the chicken with the leeks & sun-dried tomatoes and serve!


Printer-friendly version
Source: Skinny Taste

In case you were wondering, I chose this chicken broth because of the low sodium. There are other brands that say "low sodium," but when I read the label this was significantly lower than all the others. I am always looking for ways to cut out the salt (since so much food out there is high in sodium) and this one was the best option! And that wine you see in the background is Simply Naked Pinot Grigio - one of my favorites!